Accessories needed to upgrade the speakers:
1. Customized Taranis dedicated speakers
2. 3D printed fixing bracket (because the speaker is larger than the original one, a special fixing seat is required, and the speaker has been fixed on it)
3. Glue gun equipped with hot melt glue
4. Phillips screwdriver (used to disassemble the remote control shell)
FrSky Taranis Q X7 upgrade steps:
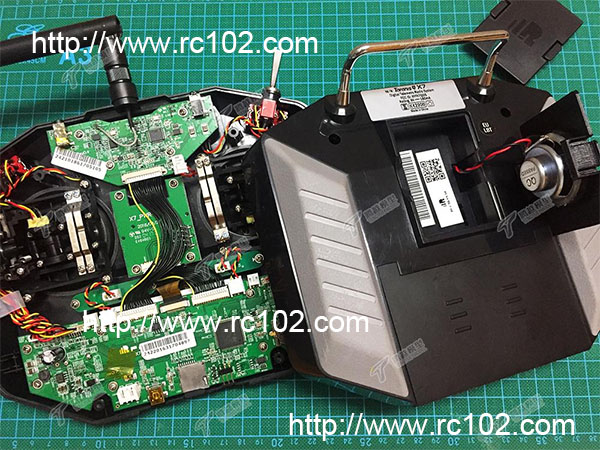
Due to the smaller internal space of the QX7 remote control, we can’t fit our customized speakers at all, so we use another mount to fix it in the slot on the back of the remote control. This is much simpler than the X9DP upgrade steps. Maybe You can complete the upgrade in less than 5 minutes.
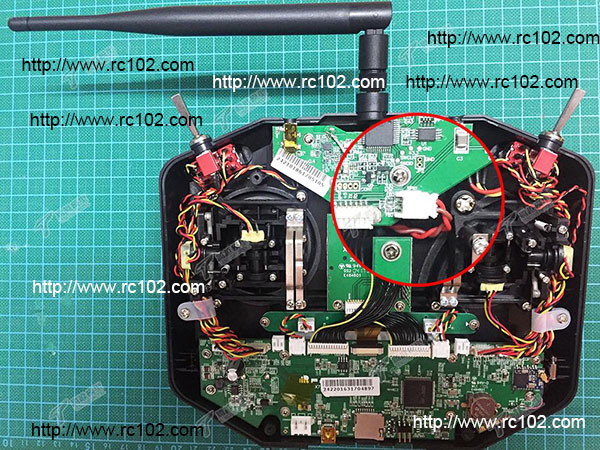
1. Take out the Taranis Q X7 battery (when you are using the controller, please turn it off first), remove the 4 screws on the back of the remote control, and then open the case. You may not see the speaker yet, yes, it is The circuit board on the shell is covered, but it’s okay, we don’t need to remove the original speaker, you only need to unplug the original cable (as shown below)
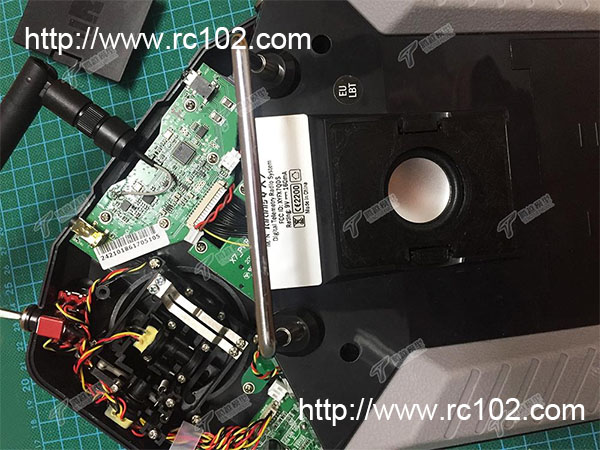
2, Insert the prepared upgrade speaker cable through the slot on the back of the remote control, insert it into the corresponding position of the front shell circuit board (see the figure below), and finally cover the back shell, screw on 4 screws, upgrade success.
 Repair parts replacement:
Upgrade speaker Frsky Taranis Q X7 spare parts
Repair parts replacement:
Upgrade speaker Frsky Taranis Q X7 spare parts
This product was added to our catalog on Tuesday 11 April, 2023.
![(image for) [RC102] 60A with brush power adjustment Rlaarlo AX-917 AX-787 RC Car Spare Parts](images/rlaarlo/rlaarloak787/rlaarlo-ak-917-parts-57.jpg "[RC102] 60A with brush power adjustment Rlaarlo AX-917 AX-787 RC Car Spare Parts")
![(image for) [RC102] 120A with brush power adjustment Rlaarlo AX-917 AX-787 RC Car Spare Parts](images/rlaarlo/rlaarloak787/rlaarlo-ak-917-parts-58.jpg "[RC102] 120A with brush power adjustment Rlaarlo AX-917 AX-787 RC Car Spare Parts")
![(image for) [RC102] 80A with brush power adjustment Rlaarlo AX-917 AX-787 RC Car Spare Parts](images/rlaarlo/rlaarloak787/rlaarlo-ak-917-parts-56.jpg "[RC102] 80A with brush power adjustment Rlaarlo AX-917 AX-787 RC Car Spare Parts")
