Frsky Taranis X9D/X9D Plus/X9D Plus SE/X9D Plus SE 2019 upgrade steps:
The entire upgrade process only takes about 10 minutes.
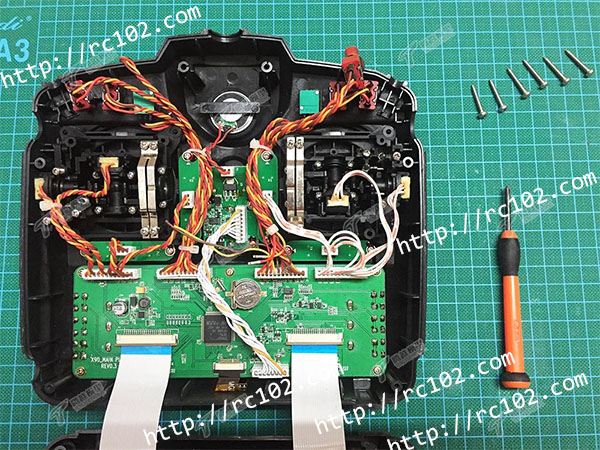
1. Take out the Taranis battery (when you are using the controller, please turn it off first), remove the 6 screws on the back of the remote control, and then open the case, you will see a small speaker in the front case (as shown below) ). There are only 2 ordinary electronic wires to connect the speakers to the circuit board (the upgraded speakers use ultra-soft, low-impedance, high-quality silicone wires).
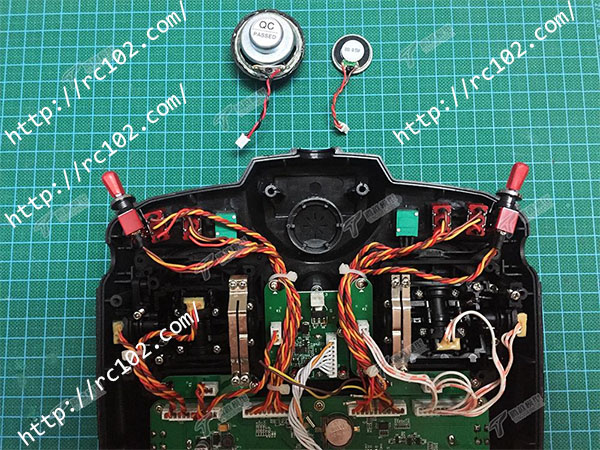
2. Unplug the power cord first, and take out the original speaker (there may be a little glue sticking it to the shell), don't worry about unplugging the original speaker forcefully and set it aside (see the picture below, the original speaker is compared with the upgraded model) Does it look extraordinarily mini?)
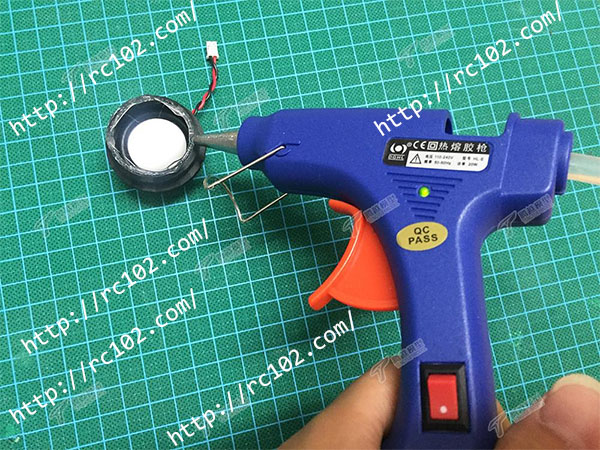
3. Apply hot melt glue to the bottom of the upgraded speaker mount (apply evenly, see the picture below).
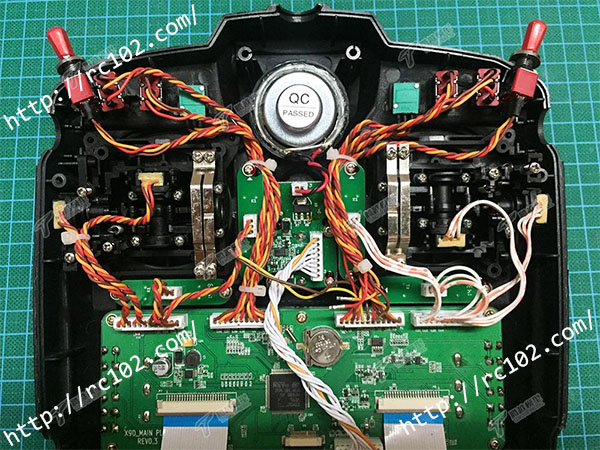
4. Before the hot melt glue is dry, quickly glue it to the front cover of the remote control, plug the connecting wire back into the circuit board (see the figure below), and finally screw on the back cover with 6 screws. The upgrade is successful.
 Repair parts replacement:
Upgrade speaker Frsky Taranis X9D/X9D Plus/X9D Plus SE/X9D Plus SE 2019 spare parts
Repair parts replacement:
Upgrade speaker Frsky Taranis X9D/X9D Plus/X9D Plus SE/X9D Plus SE 2019 spare parts
This product was added to our catalog on Tuesday 11 April, 2023.
![(image for) [RC102]Camera protective cover SJRC F7 4K PRO RC Drone Spare Parts](images/sjrc/f7/sjrc-f7-pro-parts-15.jpg "[RC102]Camera protective cover SJRC F7 4K PRO RC Drone Spare Parts")
![(image for) [RC102]USB charger SJRC F7 4K PRO RC Drone Spare Parts](images/sjrc/f7/sjrc-f7-pro-parts-14.jpg "[RC102]USB charger SJRC F7 4K PRO RC Drone Spare Parts")
![(image for) [RC102]4K HD Wifi camera with 3-axis gimbal SJRC F7 4K PRO RC Drone Spare Parts](images/sjrc/f7/sjrc-f7-pro-parts-16.jpg "[RC102]4K HD Wifi camera with 3-axis gimbal SJRC F7 4K PRO RC Drone Spare Parts")
